Organise your Areas
Group your properties into regions, zones, neighbourhoods and communities, in the order your clients search.
- Admin
- ⏱ 1 min
- Updated October 6, 2026
Open Areas
In Settings, tap the Areas tab. They're grouped by kind, with how many properties each one holds.
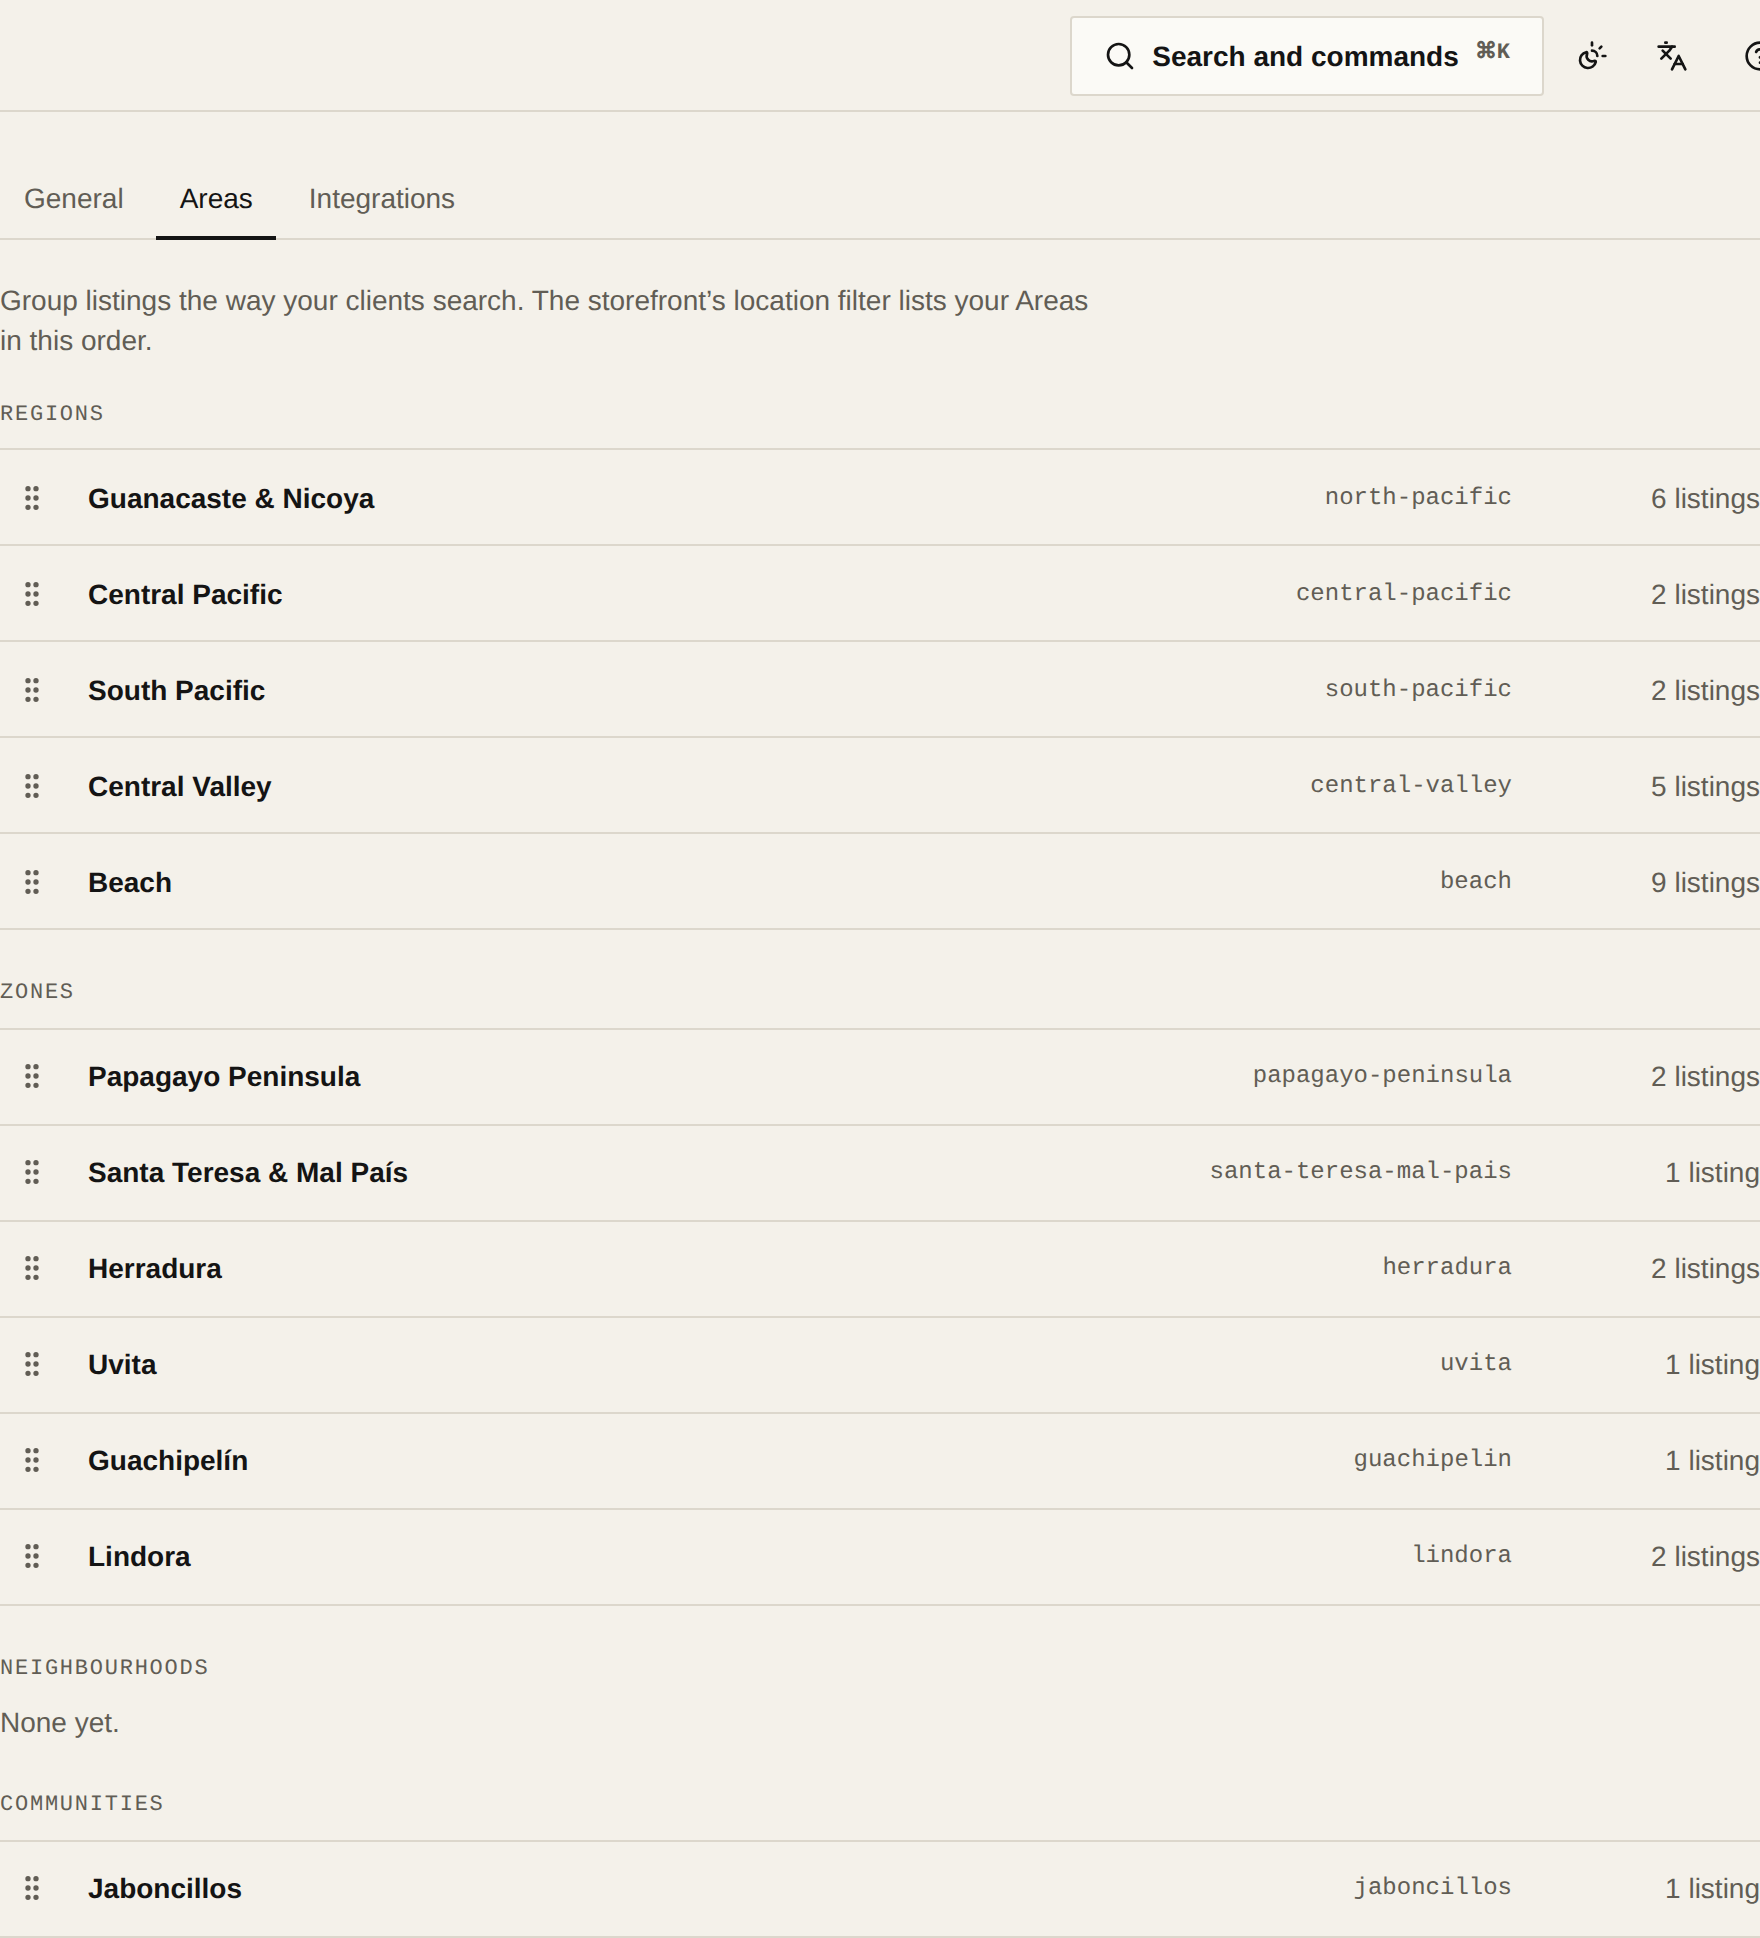
Create an Area
Tap New Area and pick the Kind: Region, Zone, Neighbourhood or Community. Write the name in your site's main language; the other languages are optional. The Slug fills itself in and is used in your site's links.
Tell it which Places it covers
Under Places in this Area, search in Add a Place and pick one or more. Listings in those Places, or anywhere inside them, are in the Area, and below you see how many match. Tap Create Area.
Put them in order
Drag a row's handle to move it within its kind, or focus the handle and use the arrow keys. The order saves on its own, and your site's location filter lists them that way.
Edit or delete one
Tap an Area's name, change what you need and tap Save. To remove it, tap Delete and then Delete Area. Its properties leave it, and any lead criteria or menu items that name it will no longer match.
Agents see Areas in their menu, but only to look: the page tells them "Only an admin changes Areas."