Choose your header and footer
Pick how the top and bottom of every page look, and show an Agent as your brand.
- Admin
- ⏱ 2 min
- Updated October 14, 2026
Open the Style tab
In Website, open the Style tab and scroll to Header.
Pick a header
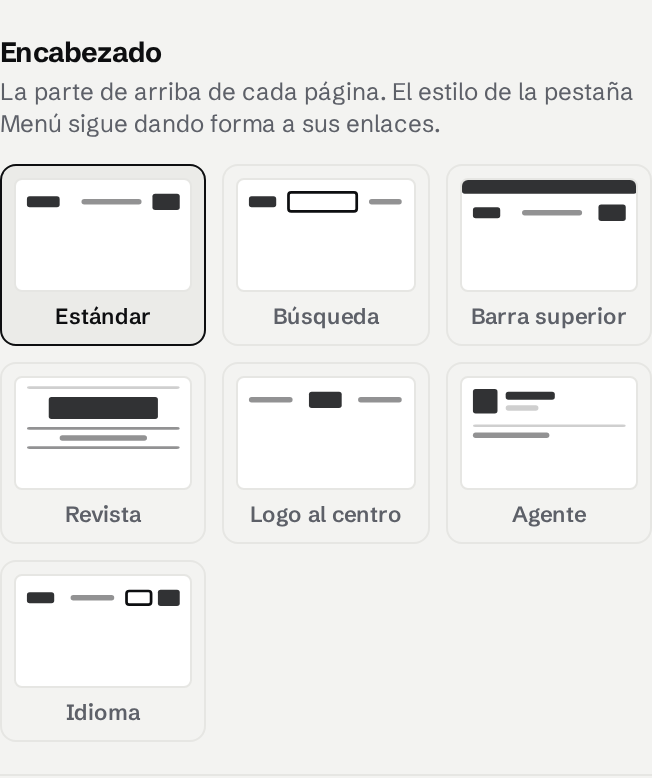
Tap a style: Standard, Search (a property search in the bar), Utility bar (your phone, WhatsApp and language above the menu), Masthead (your site name set large), Centred logo (menu links either side of the logo), Agent (an Agent's photo and name instead of the logo) or Language (a large language switch and a button to talk to an advisor). The menu style from the Menu tab still shapes the links, and on a phone the menu always opens as a panel.
Choose the Agent
With the Agent header, pick who shows in Agent. Leave it on the first Agent if you work alone. To open your home page with that Agent's photo, bio and contact buttons, tap the home page's first section in the preview and set Layout to Agent under Appearance.
Pick a footer
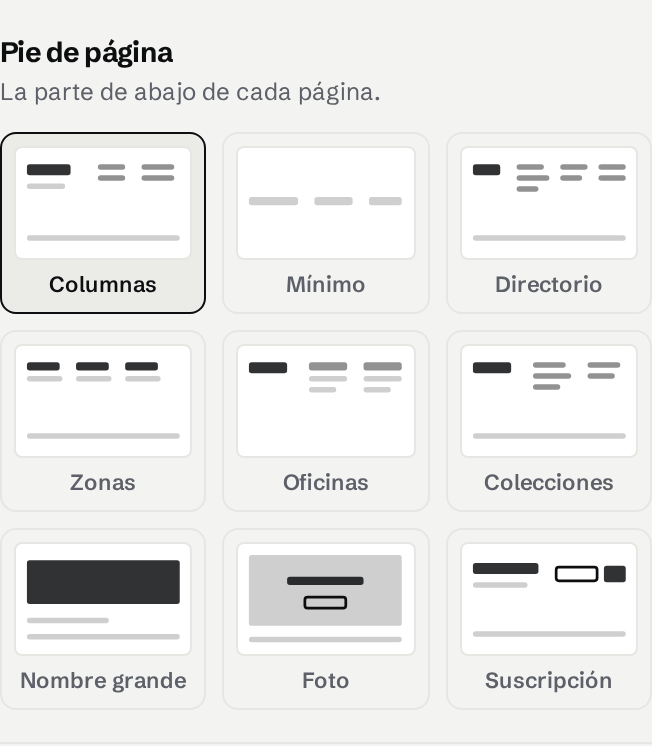
Under Footer, tap Columns, Minimal, Directory (links to your listings by province, type and price), Areas (one column per Area), Offices, Collections, Wordmark (your site name set huge), Photo (a photo with a button to contact you) or Signup (an email field). Directory and Areas show your link columns while there's nothing to list, and so does Collections for now.
Fill in what your footer shows
With Photo, add a Footer photo; without one it uses your home page's photo. With Signup, write the Signup headline and Signup text in each language. Each email left there arrives in Leads from the source Site footer. With Offices, add them in the Pages tab: on the Contact page, under Business details, tap Add office.
Publish
Check the preview at phone size, then tap Publish.